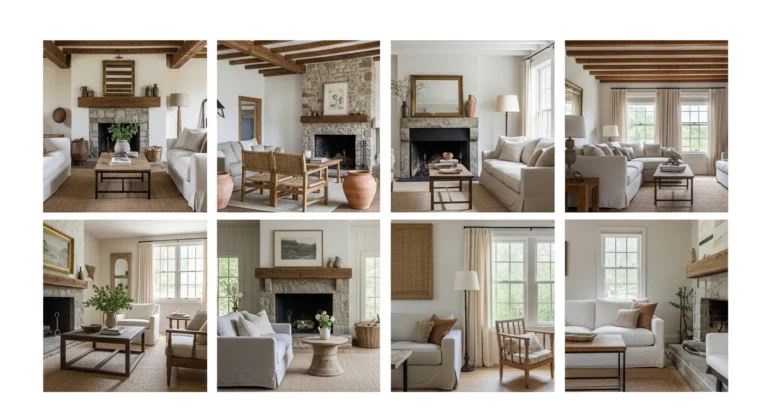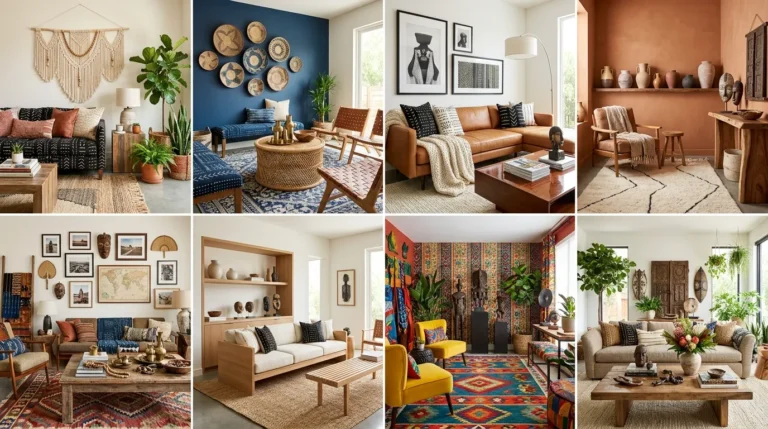
Decorating a living room as a beginner is a journey of balancing Hard Architecture with Soft Soul and personal history. By following this comprehensive, step-by-step guide—starting with core functionality, applying the professional 60-30-10 color rule, and layering in texture and light—you create a space that is as sophisticated as a high-end editorial spread. A truly successful living room integrates seamless elements like floor-to-ceiling built-in wardrobes that match the wall color, hand-hewn timber beams for architectural weight, and layered lighting that transforms the room’s energy from morning to night. In this masterclass, we focus on “Zero-Waste Geometry” and “Collected and Creative” styling, ensuring your home feels like a curated sanctuary that is both modern and deeply inviting for your unique lifestyle. Remember, a great room isn’t finished in a day; it is a creative process that evolves as you add pieces that resonate with your personal journey while keeping the background architecture clean and calm.
Step 1: Start With Function Before Style
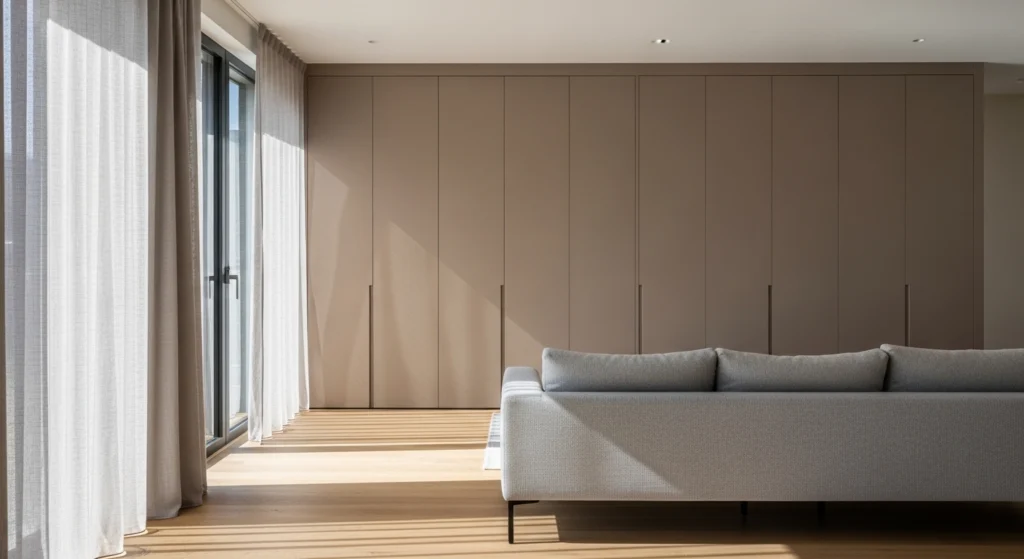
The most common mistake beginners make is choosing a “look” or a specific trend before they understand the physical flow and functional requirements of their daily life. Before you buy a single item, you must determine if the room is a high-energy hub for family gatherings, a quiet library for reading, or a cinematic retreat for evening entertainment. For a truly functional home, consider “Background Architecture” like a floor-to-ceiling built-in wardrobe finished in a matte lacquer to hide “life clutter” such as board games, blankets, and electronics. By focusing on utility first, you ensure that the layout supports your movement, allowing the style to follow naturally from a place of organized, stress-free purpose and architectural intent. This step is about the “bones” of the room, setting a high-intent foundation that ensures your living room remains practical even as your personal aesthetic tastes evolve over the coming years.
Step 2: Apply the 60-30-10 Color Formula
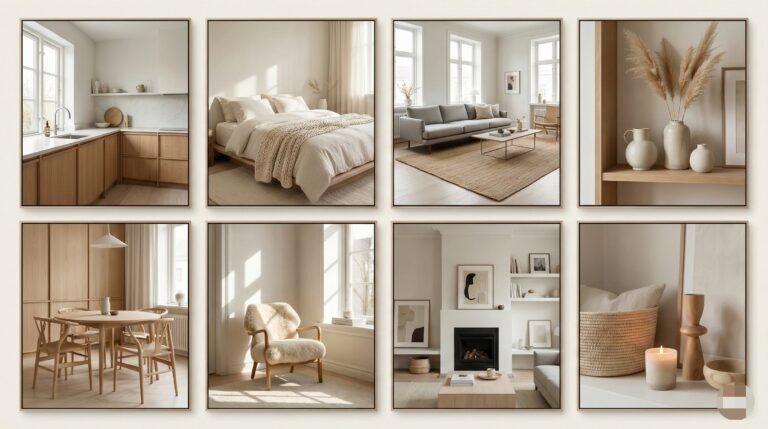
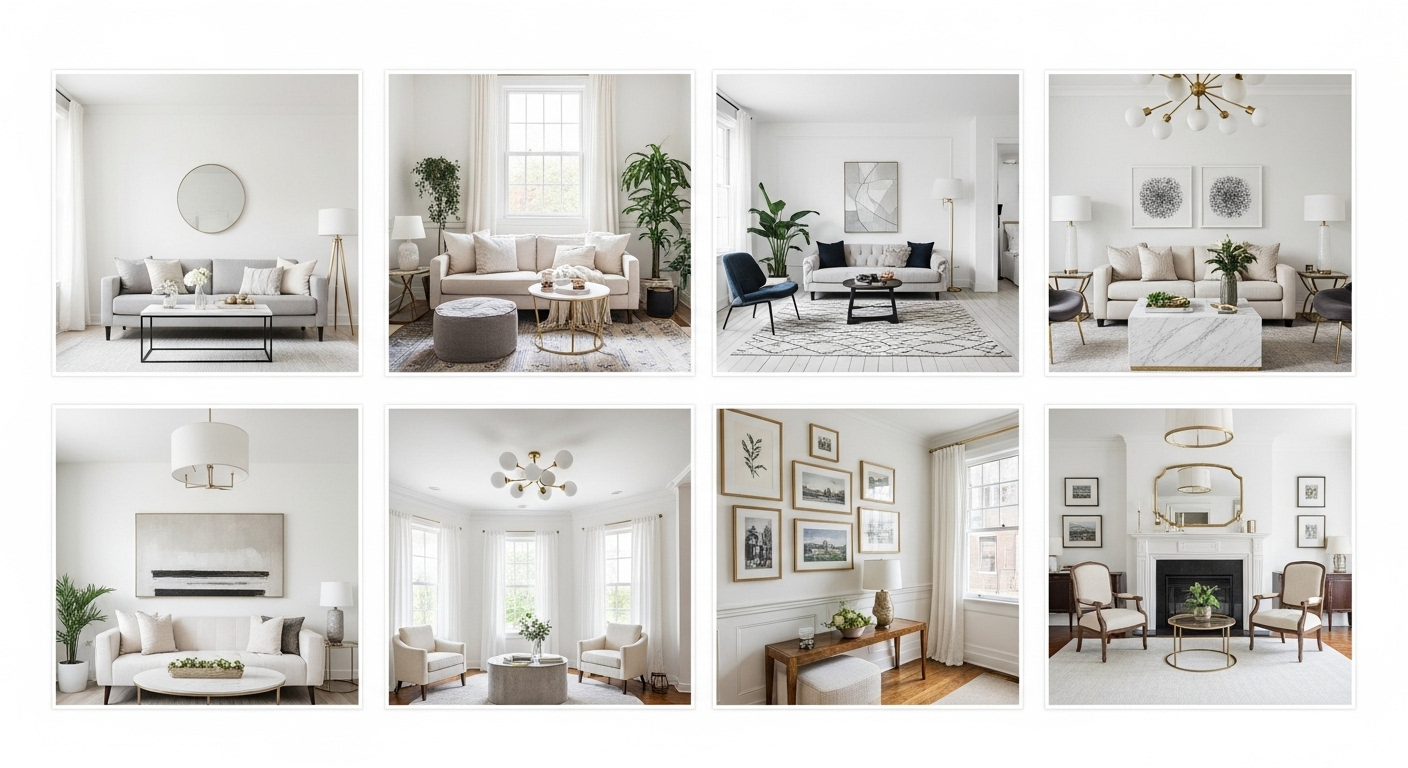
One of the biggest mistakes beginners make is choosing colors too late in the process; a clear palette creates consistency and makes the subsequent shopping experience significantly easier. To achieve a professional, balanced look, use the 60-30-10 Rule: 60% should be your dominant color (walls and large furniture), 30% is your secondary color (rugs and curtains), and 10% is your accent color (pillows and art). For a “Warm Modern” and beginner-friendly foundation, stick to a neutral 60% base of soft whites or muted beiges, which allows for maximum flexibility as global design trends change. If you love bold colors, introduce them through the final 10% of decor pieces—they are the easiest to swap later without needing to repaint your walls or replace an expensive sofa. This mathematical discipline ensures the room feels “Clean and Calm,” providing a serene backdrop that highlights the natural beauty of your wood furniture and stone accents.
Step 3: Choose the Right Sofa First
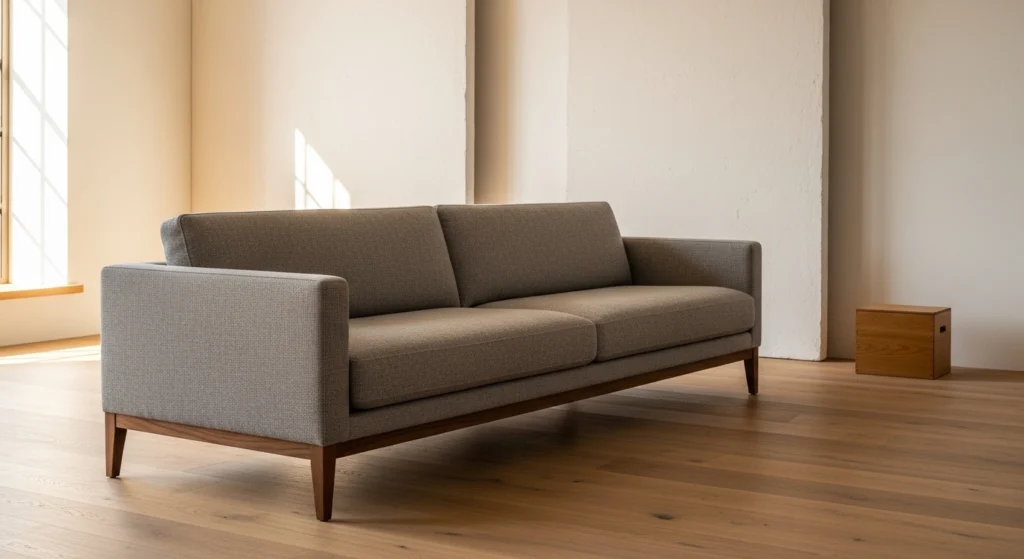
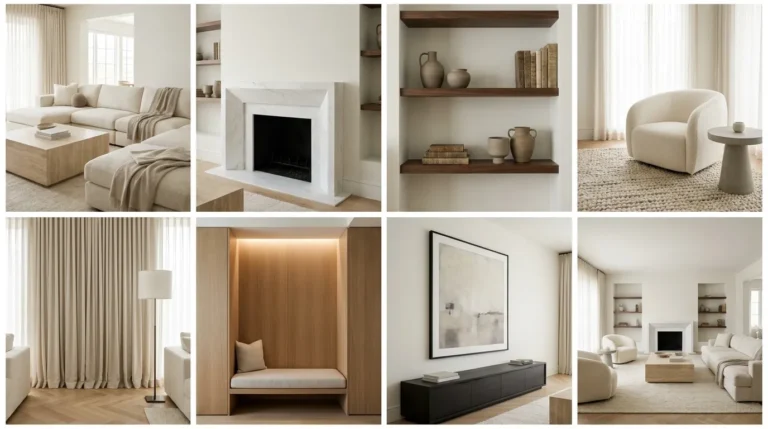
The sofa is the primary “anchor” of the living room and usually the largest financial investment you will make, so it must be selected with extreme precision and long-term care. For a modern, sophisticated look, opt for a low-profile silhouette with clean lines and tapered wooden legs, which allows for better “visual flow” and makes a small room feel much larger. Choose a high-performance fabric in a neutral grey or oatmeal to serve as a “white canvas” for the rest of your decor, allowing you to swap out accent pillows as your style shifts. Ensure the scale of the sofa is proportionate to your room’s dimensions; an oversized sectional can “smother” a small space, while a tiny loveseat can leave a large room feeling empty. This single piece of furniture defines the “soul” of your seating area, so prioritize quality materials like top-grain leather or heavy-weight linen for long-term comfort and a high-end feel.
Step 4: Plan Your Furniture Layout with “Zero-Waste Geometry”
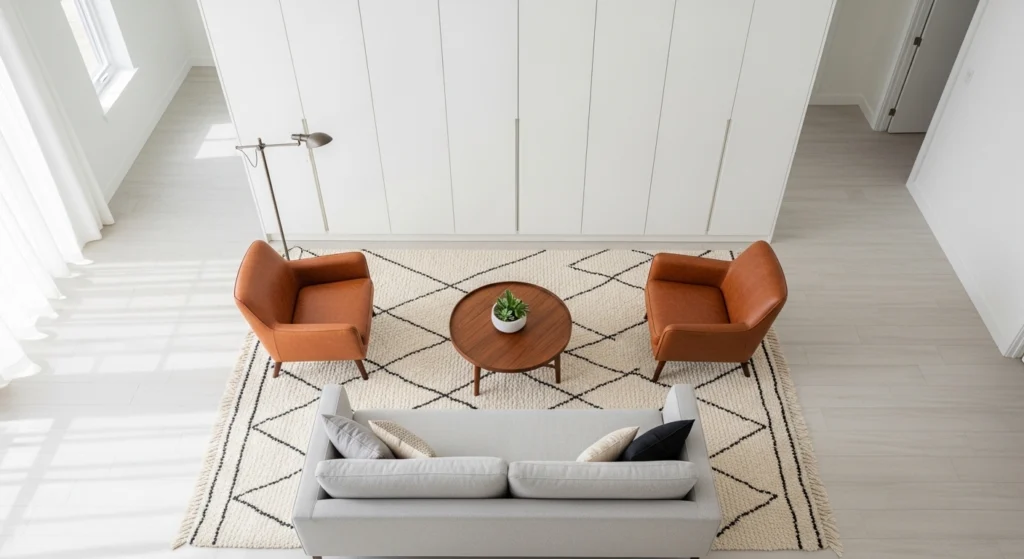
A successful furniture layout is an exercise in spatial awareness, ensuring that every piece is placed to maximize conversation, natural light, and the physical flow of the home. Instead of pushing all your furniture against the walls—a classic beginner error that creates a “waiting room” vibe—pull your sofa and chairs inward to create a “conversation circle.” Leave at least 30 to 36 inches of “walking room” between major pieces so the room doesn’t feel cramped or difficult to navigate during a busy gathering. If you have an open-concept space, use a large built-in wardrobe or a floating shelf unit as a “room divider” to define the living zone without closing it off entirely. This structural planning ensures the room feels architecturally sound and professionally designed, providing a clear sense of order and sophisticated flow. By leaving some “negative space” near windows, you allow the architecture of the house to breathe, making the entire living area feel more expansive and expensive.
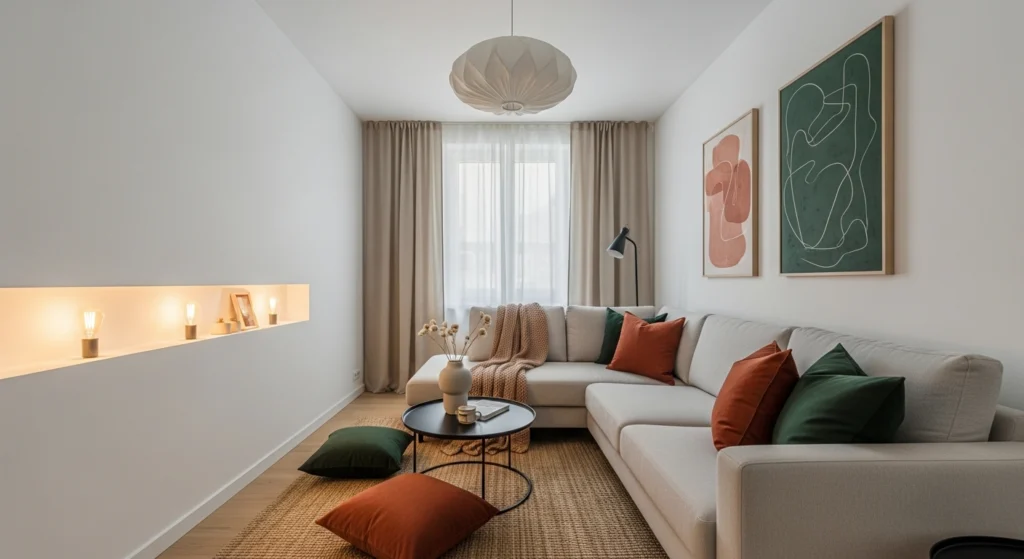
Step 5: Add a Properly Sized Rug to Anchor the “Map”
In the world of interior design, the rug is the “map” that tells your furniture where to sit, and its size can either make or break the entire room’s proportions. A common beginner mistake is buying a rug that is too small, which makes the furniture look like it is “floating” in a sea of flooring rather than being grounded. Ideally, all four legs of your sofa and accent chairs should sit on the rug, or at the very least, the front two legs must be firmly anchored to the textile. For a “Warm Modern” aesthetic, choose a large jute or wool-blend rug in a neutral tone to provide a textured foundation that feels incredible underfoot. A properly sized rug “stretches” the room visually, making it feel more expansive, luxurious, and intentionally designed for high-end residential living. It also provides a necessary acoustic layer, dampening echoes and making the room feel like a quiet, private sanctuary.
Step 6: Layer Lighting (The Secret to Atmosphere)
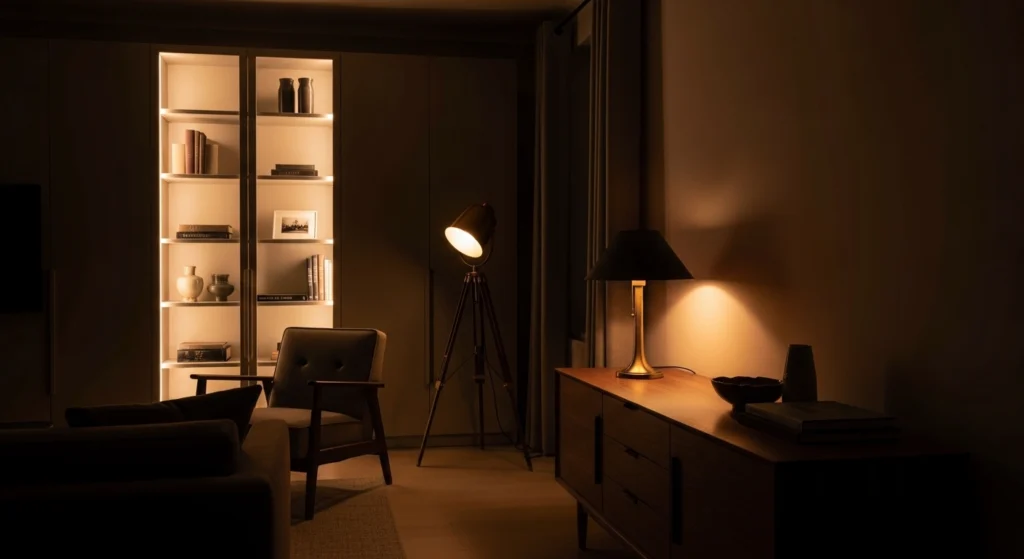
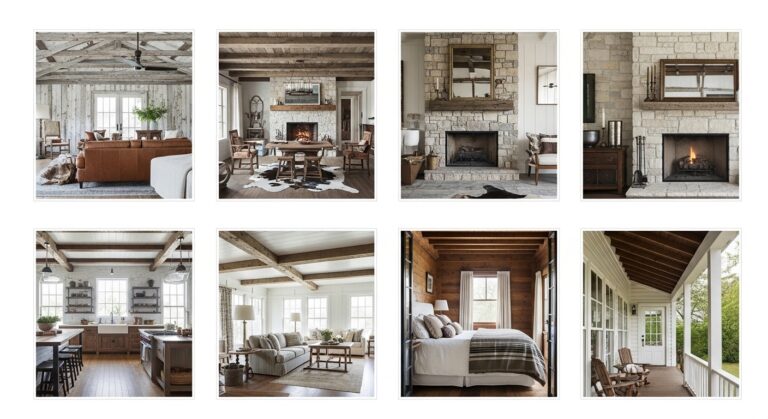
Lighting is the most powerful tool for creating atmosphere, yet most beginners rely on a single overhead “big light” that flattens the room and erases its character. To decorate like a pro, you must “Layer” your light: start with ambient recessed ceiling lights, add task lighting like a brass lamp for reading, and finish with accent lighting like LED strips inside a built-in wardrobe. This multi-level approach erases dark corners and adds a “glowy,” sophisticated depth that makes the living room feel twice its actual size after the sun goes down. Use warm-white bulbs (2700K) to enhance the natural grain of your walnut furniture and the soft texture of your Roman clay walls. Lighting shifts the room’s energy, allowing it to transition from a bright, optimistic morning hub to a low-level, candle-lit sanctuary for evening recovery. It is the invisible architecture that defines the mood of every “collected and creative” home.
Step 7: Add Texture for Visual and Tactile Depth
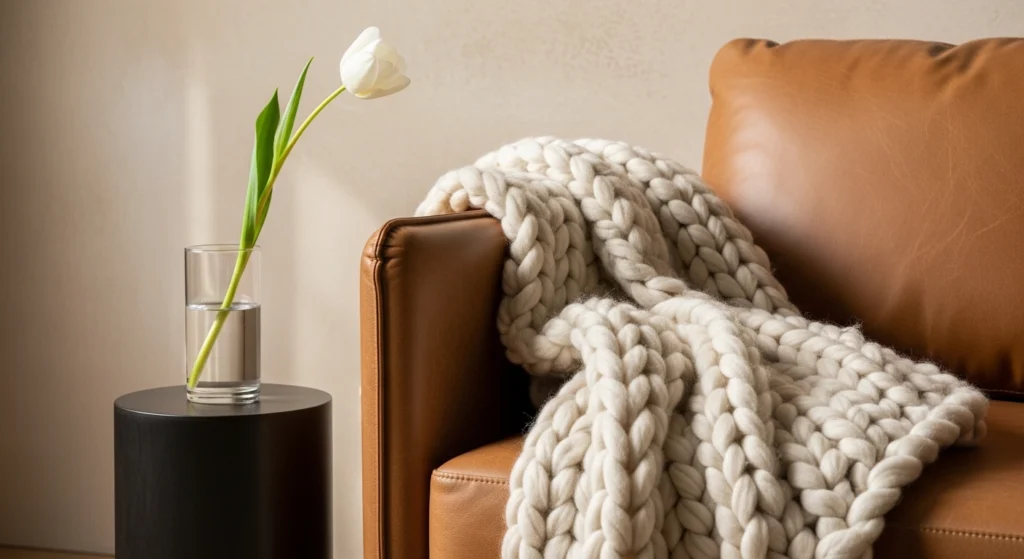
Texture is the “secret sauce” that prevents a neutral room from feeling boring; it is what provides the “tactile luxury” that makes a home feel truly high-end. Combine “hard” surfaces like a marble coffee table or a blackened steel lamp with “soft” elements like a cognac leather armchair, velvet pillows, and a chunky wool throw. This interplay of materials adds “micro-shadows” to the room, creating a sense of history and “soul” that feels collected over time rather than bought in a single day. On a side table, place a clear glass vase half-filled with water and a single long-stemmed flower to introduce an organic, living texture to the space. Thoughtful layering of materials ensures the room feels “Warm Modern” and inviting, engaging the senses and providing a sophisticated, lived-in character. Texture is what makes a minimalist room feel “full” without needing to fill it with unnecessary clutter.
Step 8: Style Your Coffee Table with Natural Vignettes
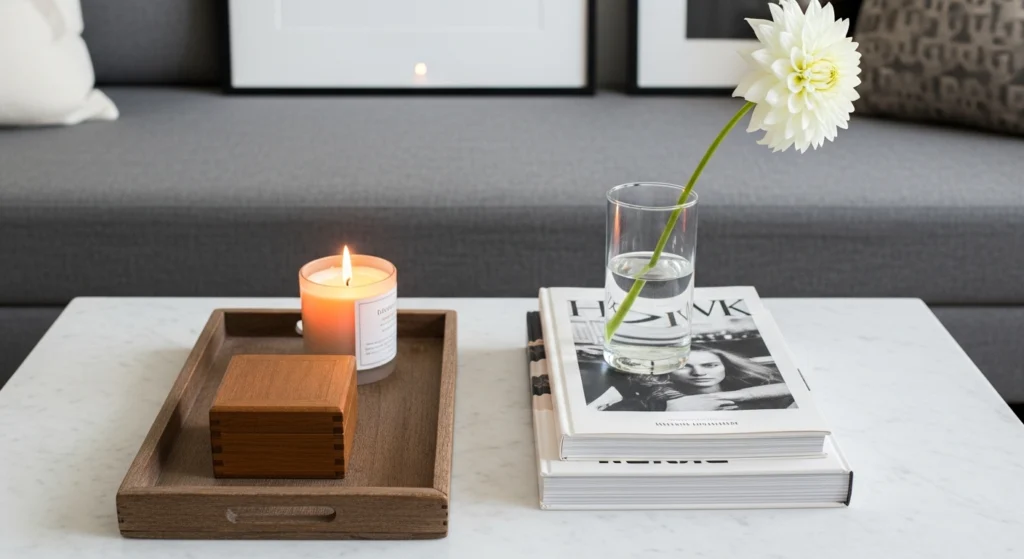
Styling your surfaces is the “jewelry” of the room, where you can express your creative personality through small, intentional vignettes and “Active Decor.” Use the “Rule of Three” on your coffee table: one vertical item (a tall vase), one horizontal item (a stack of art books), and one sculptural item (a small wooden box). In this guide, we emphasize a “natural” look—place a glass half-filled with water and a long-stemmed white dahlia next to a burning beeswax candle for a realistic, editorial vibe. Keep your surfaces from becoming cluttered by using a “Background Architecture” approach—store remote controls and clutter inside a wooden box or a nearby built-in wardrobe drawer. These small, curated moments are what guests notice most, as they provide a sense of life, freshness, and sophisticated curation to the home. It turns a piece of furniture into a storytelling platform for your personal aesthetic.
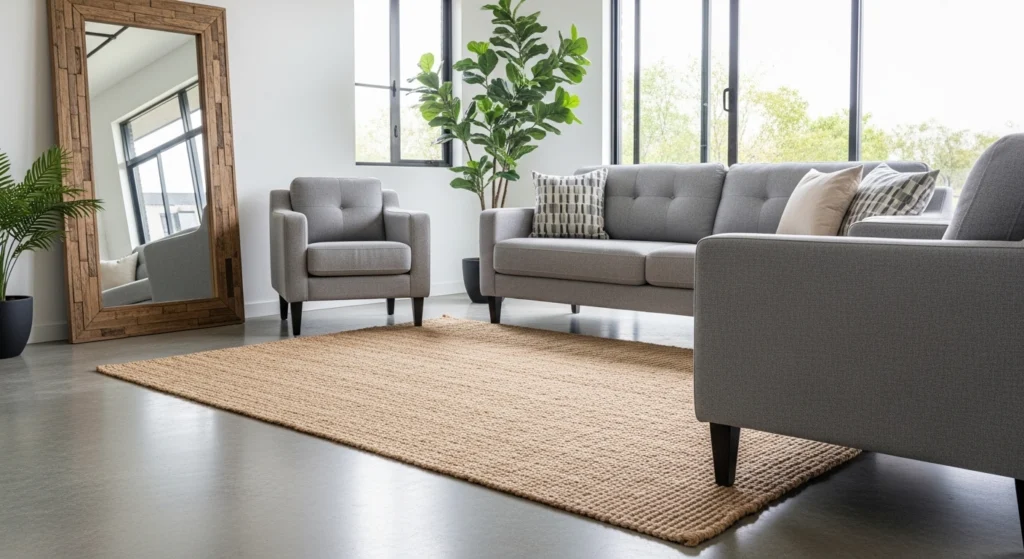
Step 9: Add Wall Decor with Architectural Intention
Wall decor should be the final “Collected” layer of your living room, used to anchor your furniture and draw the eye toward your room’s best architectural features. Instead of hanging many small items that create “visual noise,” opt for one large-scale abstract painting or a 7-foot leaning mirror with a rustic timber frame. If you prefer a gallery wall, keep the frames consistent in material—like all black iron or all light oak—to maintain a sense of modern order and sophisticated discipline. Ensure your art is hung at “eye level” (roughly 57 to 60 inches from the floor) to keep the room feeling grounded and connected to the seating area. This final step turns your walls into a “creative sanctuary,” reflecting your personal journey while reinforcing the clean and calm atmosphere of the overall design. It completes the vertical geometry of the room, making the space feel finished and professionally curated.
Common Beginner Living Room Mistakes to Avoid
One of the most frequent errors is the “Floating Rug” syndrome, where a tiny rug sits under the coffee table like an island, making the room feel disconnected and small. Another mistake is buying a “matching set” of furniture from a big-box store; a sophisticated room should feel “collected,” mixing leather, wood, and metal for a richer story. Beginners also tend to hang art too high, which disconnects the visuals from the furniture and makes the ceiling feel awkwardly low. Lighting is often overlooked, with many people living under a harsh, clinical overhead light rather than using lamps to create “glowy” zones of comfort. Finally, don’t ignore the “Background Architecture”—if your walls are flat and boring, consider a built-in wardrobe or a Roman clay finish to add the necessary depth and value to the space. Avoiding these pitfalls ensures your first decorating attempt looks like a high-end designer’s work.
Final Thoughts
Mastering the art of living room decoration as a beginner is a journey of balancing “Hard Architecture” with “Soft Soul” and personal history. By following this step-by-step guide—starting with function, applying the 60-30-10 color rule, and layering in texture and light—you create a space that is as sophisticated as an editorial spread. Remember that a great room isn’t finished in a day; it is a “Collected and Creative“ process that evolves as you add pieces that resonate with your personal journey. Keep your “Background Architecture” clean, your layout open, and your surfaces styled with intentional, natural beauty like fresh flowers and burning candles. With these principles, your living room will remain a “Warm Modern” haven that provides comfort and inspiration for years to come. It is about creating a space that doesn’t just look good, but feels like the most authentic version of you.